Building user interface
In this lesson, you create a layout in XML that includes a text label and a button with string resource.
Declaring your UI layout in XML rather than runtime code is useful for supporting different screen sizes and platforms. For example, you can create two versions of a layout and tell the system to use one on small screens and the other on large screens.
Create a Layout
First of all, you need to create an XML file that will define the screen Graphical User Interface (GUI).
Note
So far in Eclipse there is no “What You See Is What You Get” (WYSIWYG) plugin to design the screen GUIs.
- Create a res/layout/ folder.
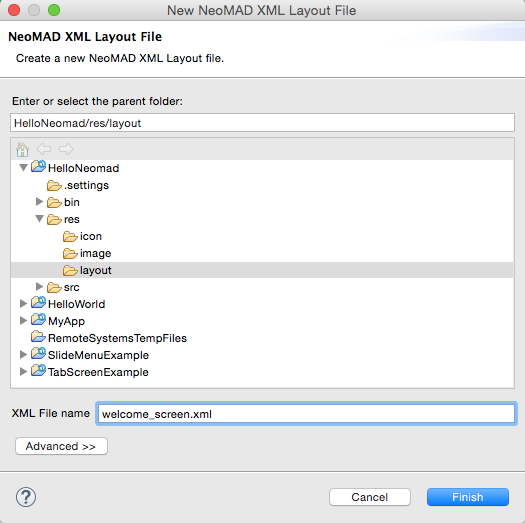
- Select the layout folder then right click and File > New > NeoMAD XML Layout File
In this example we have named the XML file: welcome_screen.xml

- Click on the finish button

- Copy the following code inside the
welcome_screen.xmlfile defining the screen UI:
<?xml version="1.0"?>
<!-- A VerticalLayout represents a group of views arranged vertically.
        We want the VerticalLayout to fill all the screen size
        and the content to be centered into the VerticalLayout. -->
<VerticalLayout xmlns:xsi="http://www.w3.org/2001/XMLSchema-instance"
        xsi:noNamespaceSchemaLocation="http://www.neomades.com/XSD/4.0.0/layout.xsd"
        stretchHorizontalMode="MATCH_PARENT"
        stretchVerticalMode="MATCH_PARENT"
        contentAlignment="HCENTER|VCENTER">

        <!-- A TextLabel allows to display a simple text on the screen.
                We want the TextLabel size to match the text. -->
        <TextLabel
                stretchHorizontalMode="MATCH_CONTENT"
                stretchVerticalMode="MATCH_CONTENT"
                text="Hello World" />
</VerticalLayout>
- You can now point to your GUI in the
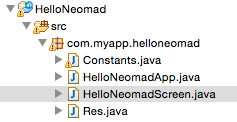
HelloNeomadScreen.javafile.

/**
 * Application page screen
 */
public final class HelloNeomadScreen extends Screen {
        protected void onCreate() {
                // Fill the screen with the HELLOWORLD_SCREEN layout
                setContent(Res.layout.WELCOME_SCREEN);
        }
}
Add String Resources
String resources are stored into the res/string/strings-en.xml file.
The structure of the res/string directory is described as follows:
- the name of the XML file should be
strings-{LOCALE IDENTIFIER}where{LOCALE IDENTIFIER}describes the language and the region; language names must be compliant with ISO 639-1 and can be followed by the region code in the ISO 3166-1 format (e.g. en, en-US, fr, fr-FR, fr-CA).
Let’s edit the string file and add the message:
<?xml version="1.0" encoding="utf-8"?>
<strings xmlns:xsi="http://www.w3.org/2001/XMLSchema-instance"
    xsi:noNamespaceSchemaLocation="http://www.neomades.com/XSD/4.0.0/strings.xsd">
    <string name="WELCOME_SCREEN">Greeting</string>
</strings>
For each text defined in this file, NeoMAD will automatically create a constant in Res.java.
Note
The Res.java content file is generated automatically, please do not modify it.
// Res.java Generated code
public final class Res {
        public static final class string {
                public static final int WELCOME_SCREEN = 0x7f070000;
        }
}
- Let’s add this greeting message to your TextLabel inside your
welcome_screen.xml
<!-- A TextLabel allows to display a simple text on the screen.
        We want the TextLabel size to match the text. -->
<TextLabel
        stretchHorizontalMode="MATCH_CONTENT"
        stretchVerticalMode="MATCH_CONTENT"
        text="@string/WELCOME_SCREEN" />
Add a Button
- Add the following code inside the
welcome_screen.xml
<Button
    text="@string/WELCOME_GO"
    stretchHorizontalMode="MATCH_PARENT"
    stretchVerticalMode="MATCH_CONTENT"
    id="@+id/button_welcome_go"
    margin="10" />
- Add the string resource inside the
strings-en.xml
<?xml version="1.0" encoding="utf-8"?>
<strings xmlns:xsi="http://www.w3.org/2001/XMLSchema-instance"
    xsi:noNamespaceSchemaLocation="http://www.neomades.com/XSD/4.0.0/strings.xsd">
    <string name="WELCOME_SCREEN">Greeting</string>
    <string name="WELCOME_GO">GO</string>
</strings>
