Converting to Eclipse Android project
Warning
The Eclipse Android project generation is deprecated. This means that it is not supported and may be removed in a future version.
Prerequisites
No prerequisites are needed to generate Android project files with NeoMAD. However, this guide assumes that the ADT Plugin for Eclipse is installed and that an Android Virtual Device (AVD) already exists in order to create, compile and run the Android project in Eclipse. Please refer to Android documentation for more information about Android Developer Tools.
Understand the Eclipse project
For this tutorial, the HelloWorld project (from the NeoMAD examples) will be used. It will be built for language 1: English.
First, the NeoMAD project must be built. This will generate an ANDROID directory containing an Android binary and a directory named HelloWorld_ANDROID_1.0.0_en-eclipse and containing the following:
- application’s Java source code in the
srcdirectory - project resources in the
resandassetsdirectories (the latter contains the fonts, in case the project uses any) - Android project files:
AndroidManifest.xmlandproject.properties - NeoMAD library for Android in the
libsdirectory - NeoMAD dependencies in the
reflibdirectory - Eclipse Android project files:
.projectand.classpath
Import the Android project in Eclipse
- In Eclipse create a new Android project by selecting File -> New -> Project…
- In the selection screen wizard select Android -> Android Project from Existing Code and click on Next
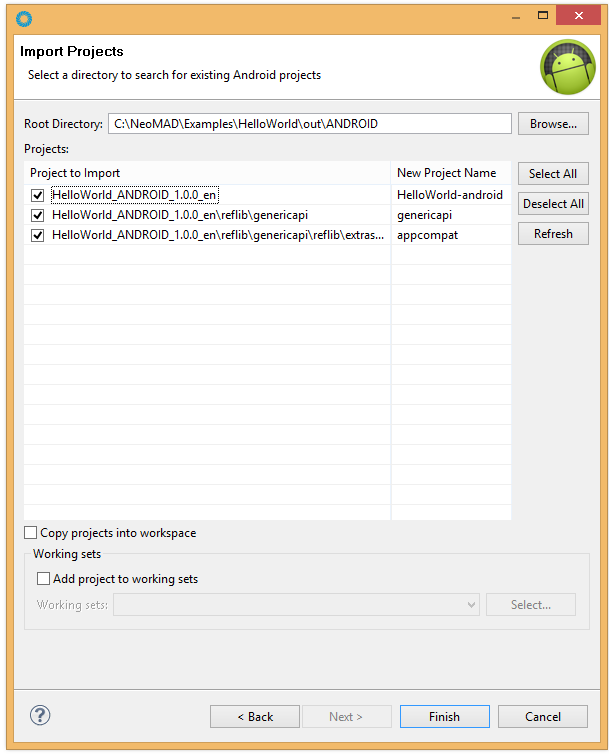
- In the Root Directory field enter the path of the Android project directory generated by NeoMAD (HelloWorld_ANDROID_1.0.0_en-eclipse) and click on Refresh
- Three projects are selected (application, genericapi, appcompat)
- Click on Finish

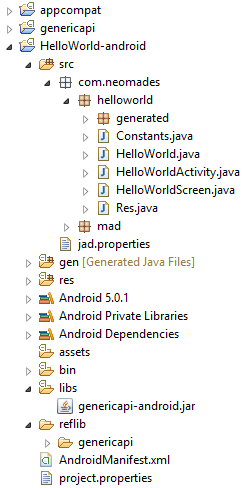
Your Android project is now created and should look like this:

Build and test the application
Right click on you Android project and select Run As -> Android Application. The application is compiled and launched on the emulator.
