Converting to Android Studio project
The operations required to use the generated project wth Android Studio are described below.
Generate the Android Studio project
The Android Studio project is automatically generated when building for the ANDROID target with the command-line or the plugin.
For more details about how to build for Android, see Building with command line and Building with Eclipse plugin.
For this tutorial, the HelloWorld project from the NeoMAD samples will be used.
Use the following command line from the NeoMAD install folder to generate the Android Studio project for HelloWorld:
neomad -t ANDROID Examples/HelloWorld/HelloWorld.urs
The Android Studio project will be generated at:
> Examples/HelloWorld/out/ANDROID/HelloWorld_ANDROID_1.0.0_en
Prerequisites to open the native project
Here is the prerequisites list:
- Android Studio should be installed
- An Android Virtual Device (AVD) should already exist, or a device should be plugged in, to be able to launch the application
Import the project into Android Studio
- Launch Android Studio
- Click on Open an existing Android Studio project
- Select the project folder generated by NeoMAD, which is HelloWorld_ANDROID_1.0.0_en, and click “OK”
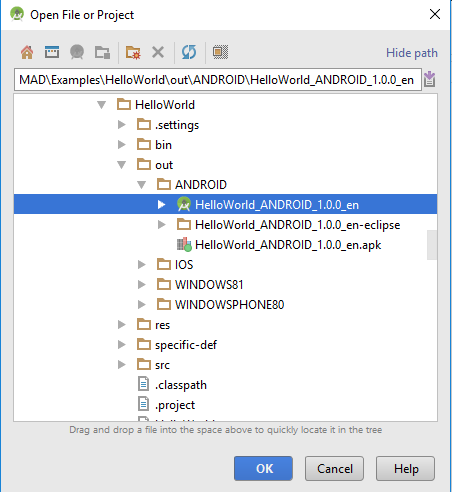
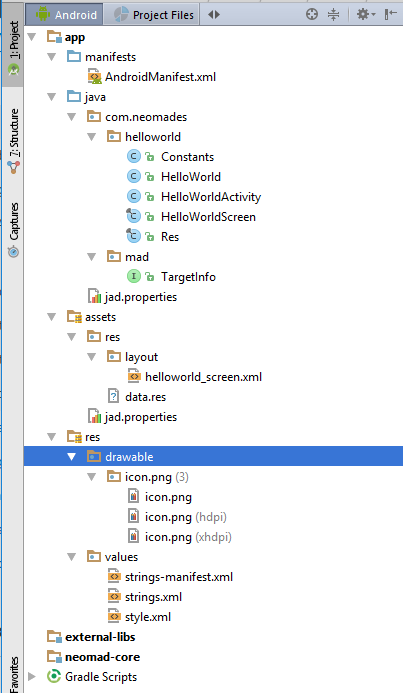
You should then have a project view that looks like the following:
Understand the Android Studio project
The imported Android Studio project has the following hierarchy:
- the application module is located in the
appfolder, which will contain files related to the application itself:- the
src/mainfolder, that contains:- the
assetsfolder, containing the assets defined in the NeoMAD project, plus some resources like layouts and fonts - the
javafolder, containing the source code of the application - the
resfolder, containing the resources added to the initial project - Android project files, the
AndroidManifest.xml
- the
- the
- NeoMAD library for Android in the
neomad-coredirectory - Project dependencies in the
external-libsdirectory - Gradle scripts to build the application:
build.gradleandapp/build.gradle
Build and run the project
The next step is to launch the application on a device or a simulator.
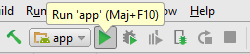
- Click on the Run button in the toolbar at the top:
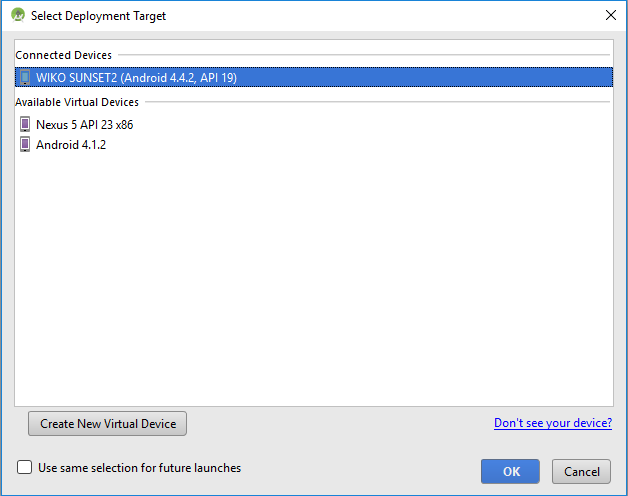
- Choose the device on which the application should be run, then click OK:
Debug the project
To debug the Android Studio project:
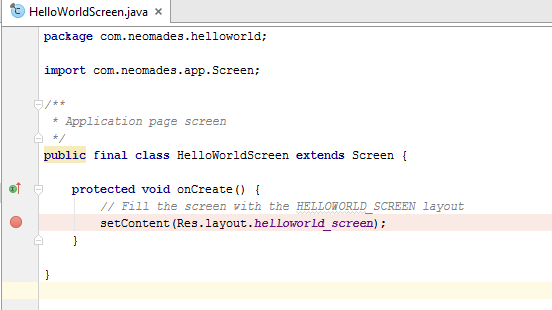
- Click on the line of code on which you want to pause the execution to set a breakpoint:
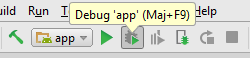
- Use the Debug button of the toolbar:
- Choose the device on which the application should be debugged, then click OK:
- Debug the application using debug commands of the Debug view at the bottom

For more details about how to debug, see Android documentation.