Agenda
The Agenda extension enables to add events in the calendar of the user using the native agenda application installed on the device (for example the Google Agenda application on Android or the Calendar application on iOS). The event will be created thanks to the extension and then the insertion work will be delegated to the native applications. Note that if there are several applications that can open a calendar, a popup will notify the user and he will be able to choose the calendar application he wants.
The result of the insertion will be available in our application thanks to callbacks to notify the user if the action was a success or a failure.
Using Agenda extension in the IDE
To be able to use the extension in your IDE and the autocompletion feature for example, please refer to the section: Importing an extension in the IDE.
Permissions
The Agenda extension requires the AGENDA permission to work. Do not forget to add the permission declaration in the URS file:
<permissions>
        <permission name="AGENDA"/>
</permissions>
Using the Agenda extension
Delegating event creation to the native application
The main feature of the Agenda extension is to create empty or customized events to insert into the user’s calendar. In both cases, the native application is always opened to let the user edit the event and confirm the event creation. The Agenda extension can never save an event in the native calendar without user confirmation. The following code shows how to request the creation of an empty event, which will open the native calendar application on an empty form:
- Create and initialize the manager which will call the native agenda application
AgendaManager manager = AgendaManager.getDefault();
- Call the method to create an empty event
manager.createEmptyEvent();
This will just open the calendar application on an empty event creation screen.
The user will then fill (or not) the event and save it (or not) in its calendar. After saving, he will return in your application. The event insertion result will be sent in your application (see Recovering the insertion result.)
Note
With some OS versions and some native applications, after the user inserted the event he will stay in the calendar application. He will have to exit it to go back to your application.
Creating events with the extension
Before inserting events in the user’s calendar, they can be filled in the application with various properties detailed in the following sections.
Customizing an event with title, start date and end date
The basic properties of an event are its title, its start date and its end date. Without these properties it seems difficult for an event to exist. Let’s see how to create such an event.
- Create the begin and end date using the
Calendarclass
Calendar calendar = Calendar.getInstance();
Date today = calendar.getTime();

calendar.set(Calendar.MONTH, calendar.get(Calendar.MONTH) + 1);
Date nextMonth = calendar.getTime();
- Create the event with a title and the previously created dates
AgendaEvent event = new AgendaEvent.Builder()
        .withTitle("My prefilled event")
        .withBeginDate(today)
        .withEndDate(nextMonth)
        .build();
And we are done. As suggested in a previous section, properties set in the code can be modified by the user before confirmation. Note that there are other simple basic properties such as the description or the location that can be use the same way. Refer to the javadoc to have the complete list.
Creating an all day event
We saw how to create an event with a start and end date (see: Customizing an event with title, start date and end date). Now let’s create an event that lasts all the day:
AgendaEvent event = new AgendaEvent.Builder()
        .withTitle("My all day event")
        .withBeginDate(today)
        .withAllDay(true)
        .build();
That’s all, simply use withAllDay(true) method.
Adding recurrence to an event
By default, an event occurs a single time at a given date, however recurrence can be added to the event if we want it to be repeated in time.
A recurrence is represented by 3 properties:
- an unit (daily, monthly…)
- an interval (each 4 days, each 3 months…)
- an end date (do not repeat anymore after a specific date)
Let’s take some examples:
- Create a recurrence that repeats every weeks
Recurrence rec = new Recurrence(Unit.WEEKLY);
- Create a recurrence that repeats every 3 days
Recurrence recurrence = new Recurrence(Unit.DAILY, 3);
- Create a recurrence that repeats every 3 days but only until next year
Calendar calendar = Calendar.getInstance();
calendar.set(Calendar.YEAR, calendar.get(Calendar.YEAR) + 1);
Date nextYear = calendar.getTime();

Recurrence recurrence = new Recurrence(Unit.DAILY, 3, nextYear);
Of course, once the recurrence created, you will have to add it to your event to apply it.
AgendaEvent event = new AgendaEvent.Builder()
        .withTitle("My recurrent event")
        .withRecurrence(recurrence)
        .build();
Adding reminders to an event
A user may want its calendar to remind him its calendar’s events automatically with a notification or something else. This can be done by adding reminders to your event.
A reminder is represented by 2 properties:
- an interval (time interval before which the reminder is triggered)
- an unit (unit of the time interval: day, month…)
Let’s take some examples:
- Create a reminder that triggers 2 hours before the event starts
Reminder reminder1 = new Reminder(2, Reminder.Unit.HOUR);
- Create a reminder that triggers when the event starts
Reminder reminder2 = Reminder.AT_START_TIME;
Once the reminder created it must be added to the event to trigger. Either a single reminder or a list can be added to the same event.
AgendaEvent event = new AgendaEvent.Builder()
        .withTitle("My event with reminders")
        .withReminder(reminder1)
        .build();
List<Reminder> myReminders = new ArrayList<Reminder>();
myReminders.add(reminder1);
myReminders.add(reminder2);

AgendaEvent event = new AgendaEvent.Builder()
        .withTitle("My event with reminders")
        .withReminders(myReminders)
        .build();
Note
This functionality is currently available only in iOS platform.
Adding invitees to an event
Calendar’s applications often enables to add invitees for an event. After the user adds the invitees, the application will send invitations to the invitees e-mail address. The extension enables to create such invitees and to add them to an event.
To create an invitee, you must set:
- a name (the invitee name)
- an e-mail address (the invitee e-mail address)
Let’s see how to create an invitee.
Invitee invitee1 = new Invitee("Invitee1", "invitee1@email.com");
Invitee invitee2 = new Invitee("Invitee2", "invitee2@email.com");
Once the invitees created, they must be added to the event. As for the reminders, either a single invitee or a list of invitees can be added at the same time for a single event.
List<Invitee> myInvitees = new ArrayList<Invitee>();
myInvitees.add(invitee1);
myInvitees.add(invitee2);

AgendaEvent event = new AgendaEvent.Builder()
        .withTitle("My event with invitees")
        .withInvitees(myInvitees)
        .build();
Note
This functionality is currently available only in Android platform.
Avoiding event collision
In general, several events can happen at the same time in a calendar. However, the user may want to remove that possibility for a specific event.
This can be done using the Availability property:
- Create an event that prevents to have an other event that will occur at the same time
AgendaEvent event = new AgendaEvent.Builder()
        .withTitle("Busy time")
        .withAvailability(Availability.BUSY)
        .build();
Note
This functionality is currently available only in Android platform.
Setting external visibility of an event
If my calendar is shared with several users, how can I create an event but hide its details from them ? e.g. I have a meeting but I do not want to share the place and the people participating.
This can be done using the Access property:
- Create a private event
AgendaEvent event = new AgendaEvent.Builder()
        .withTitle("My private event")
        .withAccess(Access.PRIVATE)
        .build();
Inserting an event
Once your event created (see: Creating events with the extension), it is really easy to add it in the user calendar.
- Initialize the agenda manager
AgendaManager manager = AgendaManager.getDefault();
- Insert the event in the manager (we consider the event was created before)
manager.createEvent(event);
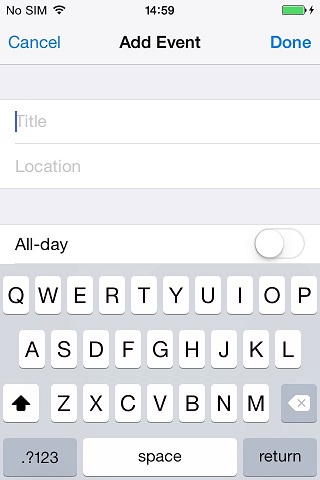
This will open the user calendar application with the event filled. Of course, if there are several calendar applications on the device, a popup will be prompted to the user and he will have to choose the application he wants to use. Let’s see several examples of native agenda application insertion page.
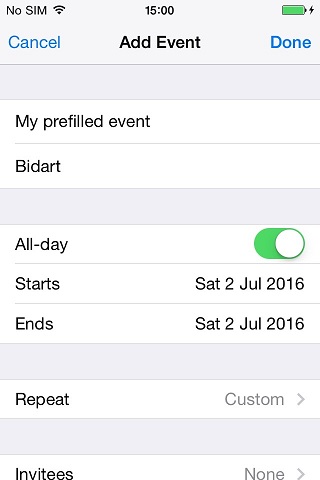 |
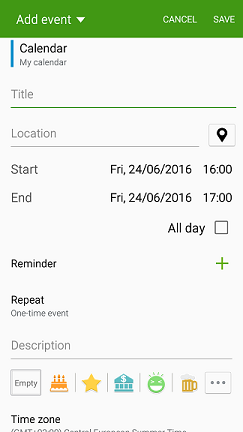 |
 |
| iOS Calendar | Android S Planner | Android Google Agenda |
Recovering the insertion result
Note
This functionality is currently available only in iOS platform.
The Agenda extension provides a mechanism to handle the result of an event creation request.
The result is stored in an AgendaEventResult object that allows to check the request status and the created event.
This object is accessible through the AgendaEventCreatedListener interface, which is a callback that can be linked to the manager when creating an event.
Let’s see on an example how to use it:
- Implement the delegate interface (here it will be our screen)
public class CreateAgendaEventScreen extends Screen implements AgendaEventCreatedListener {

    // This method is called when an insertion (with the manager method) is done
    public void onAgendaEventCreatedResult(AgendaEventResult result){
        // Handle the event insertion here
    }
}
- Create the event with the delegate
public class CreateAgendaEventScreen extends Screen implements AgendaEventCreatedListener {

    protected void onCreate() {
        AgendaManager manager = AgendaManager.getDefault();
        // Add an empty event with the AgendaEventCreatedListener
        manager.createEmptyEvent(this);
    }

    // This method is called when an insertion (with the manager method) is done
    public void onAgendaEventCreatedResult(AgendaEventResult result){
        // Handle the event insertion here
    }
}
- Handle the insertion result
public void onAgendaEventCreatedResult(AgendaEventResult result){

    // Handle insertion status
    Status status = result.getState();
    if (status == AgendaEventResult.Status.SUCCEED) {
        //do something with event
    } else if (status == AgendaEventResult.Status.CANCELLED) {
        //do something
    } else if (status == AgendaEventResult.Status.FAILED) {
        //do something
    }

    // Get the event that triggers the callback for further manipulation
    AgendaEvent event = result.getAgendaEvent();
}